| By: Scott
Fratcher - Marine Engineer/Captain. Adapted from Metal
boat repair and Maintenance
Your boat may be suffering from a variety of corrosive electrical
nasties – and you’re probably unaware of them. Scott
Fratcher describes easy ways to trace the sources – and
warns you shouldn’t delay.
Electrolysis vs. galvanic action
The two most common types of metal corrosion in the marine environment
are galvanic action and electrolysis. These terms can be confusing,
so let’s have a quick review:
Galvanic action is the electrical current formed when dissimilar
metals are placed in (or around) saltwater. A common example is
a bronze propeller on a stainless shaft.
I like to bundle together “stray current”,
“voltage leaks” and “induced
current” under the term electrolysis.
The source may be a faulty pump winding, a generator in the harbor
or a reversed polarity appliance.
At first glance, the destructive effects of galvanic action and
electrolysis look similar, but the source is completely different,
and we can observe different effects. Galvanic corrosion tends
to be a slow process, while electrolysis can destroy large amounts
of equipment quickly. A poorly-wired alternator grounding (through
the prop and back into the bonding system) can cause thousands
of dollars worth of damage very quickly. We can use this “speed
difference” to our advantage when searching for the source
of metal corrosion.
For example, electrolysis tends to leave bright patches in the
corroded metal, while galvanic action tends to leave encrusted
corrosion. Shiny metal is present because electrolysis is corroding
the metal quickly, leaving a raw surface exposed.
Tracking the source of electrolysis can be diabolical, and it
can show up as a random event. Maybe there is a voltage leak in
one appliance, or only at one marina. And the effects may only
be noticed during the annual haul-out, so locating the source
is even more challenging.
Tracing the problem
A good first step is to monitor the vessel’s surroundings.
We take a series of electrical measurements that allow us to monitor
for change. Any change alerts us to a potential problem.
To conduct a corrosion survey (searching for both electrolysis
and galvanic corrosion) you’ll need the following tools:
- Quality multi-meter
- Hertz meter (might be a function of the multi-meter)
- Silver half-cell
- AC/DC amp clamp
Galvanic corrosion survey
Everyone knows zinc protects the boat’s underwater metal,
but how much zinc is enough and is it doing its job? A simple
test will tell you: you measure the voltage of the metal being
protected, and compare it to that of a silver half-cell.
A silver half-cell is a piece of high quality silver. We dunk
it in the water next to the boat to provide a reference voltage.
We attach the silver to one multi-meter probe and the other probe
to the boat’s bonding system, or metal in question.
Tip: A silver half-cell is really just a piece of silver wire.
You’ll find a piece at any jewelry shop in the form of silver
soldering wire. Buy a 100mm piece and attach it to one multi-meter
lead. Submerge the silver wire in water near the boat and measure
voltage between it and the suspect metal.
- With the meter set on DC we should expect the following voltages
in common yacht metals protected by zinc:
- * Silicon bronze 0.24-0.27 volt
- * Brass 0.3-0.4 volt
- * Bronze 0.5-0.7 volt
- * Cast iron 0.6-0.7 volt
- * Steel 0.7-0.85 volt
- * Aluminum 0.8-1.00 volt
Less voltage means we are “freely eroding”. This
means the surface of the protected metal is disappearing into
the water and we need more zinc. More voltage means we may be
over-protected, with too much zinc. The protected metal surface
may form a hydrogen gas, causing the paint to blister.
This basic project tests the zinc protection due to galvanic
action. To expand the test, switch the volt-meter to AC. We should
see zero AC volts. If there is a reading – we have to find
and eliminate the stray volts.
Tracing stray AC volts
To begin tracing stray AC volts, switch your meter to Hertz and
check the frequency of the AC voltage – 50Hz means commercial
power such as a power cord in the water is leaking voltage back
to the dock – 60Hz means an American boat is leaking the
current.
Frequencies in the thousands mean a big DC alternator with a
bad diode is running in the area. A frequency close to 50Hz (say
49.8 Hz) means a local portable generator is leaking voltage into
the water.
To begin your trace, shut off the shore power at the dock box
and check for voltage change in the silver half-cell meter. Any
change means the boat being tested has a fault. Turn the dock
box back on and go to the boat’s main electrical board.
Turn off all branch circuits at the breaker and continue to monitor
for voltage change.
If turning off the branch circuit caused a change in the meter,
note that branch circuit and work downstream till you find the
offending piece of equipment.
Note: For this test to be effective the downstream devices must
be turned on and drawing current. For example, to test an oven
for voltage leak the oven must be on, with all elements working.
If you can’t find a leak on your boat, search the surrounding
boats. Ask permission to turn off the neighboring boat’s
dock box breaker, and watch your meter. Sometimes the marina operator
will turn off the breaker feeding the entire dock for the quick
test. A change in meter reading shows the source of the leak is
in the dock power. If there is no change, the problem lies elsewhere.
This same series of tests should be run with the meter set on
DC. Turn on every DC device aboard the vessel in two stages –
first the breaker, and then the device itself. This will show
whether the device or the feed circuit is at fault.
Be sure to start the engines and gensets and let them charge
at full capacity. Keep switching your meter between AC and DC.
Do you have a challenging corrosion problem? Why not call in
an expert? Scott Fratcher is available to help solve your marine
corrosion issues. Scott has a long history of quickly solving
corrosion problems on large and small vessels alike.
Click here to contact Scott
Fratcher, Marine Engineer
Bonding
Bonding is a system to protect many underwater metals with a
single zinc block. The idea is to inter-connect through-hull fittings
and a bronze depth sounder (for example) with a wire. This saves
having to zinc every piece of underwater metal. Any excess voltage
will bleed off through the single sacrificial zinc.
Bonding used to be the answer for almost all electrical corrosion,
but this is no longer the case because of the sheer amount of
electrical equipment near the water. A poorly maintained bonding
system is particularly dangerous because the owner believes he
is protected.
Electricians often say: “If a bonding system is not giving
any problems then leave it, but when electrical corrosion is found,
suspect the bonding system first”.
Inspecting a bonding system
A suspect bonding system is easily checked. Start at the zinc
and check the resistance between the zinc block and each protected
metal. For example, if a string of through-hull fittings is protected
by one zinc, connect one probe to the zinc and one to the through-hull.
Use the sharp tip of the probe to work your way into the metal
of the through-hull.
Note: Check the metal of the through-hull itself and not just
the bonding wire.
You should see less than one ohm between all points in the bonding
system. But you’ll often find readings in the hundreds of
ohms, or no continuity at all. This is a clear indication the
underwater metal is not protected and the zinc not sacrificing
itself. The boat may be at risk due to a weakened through-hull,
and it’s unknown to the crew.
Bonding system current check
The bonding system should be checked for continuity from bow
to stern, and it should also be checked for current. Use a clamp
amp, and look for both AC and DC. Hunt for amperage in the bonding
system connection wire. There should be no amperage at any time.
If there is, a ground loop has formed and current is traveling
through the bonding system. This is bad.
A ground loop forms when an electrical device finds a second
path to the battery’s negative terminal. The zinc bonding
system may be connected to battery ground through a variety of
paths. For example, the SSB radio ground plane is often connected
to the zinc bonding system and this provides a path to battery
ground through the back of the radio.
Another common destructive electrical path is out the zinc, into
the prop, back up the prop shaft, through the engine and to the
battery ground. In corrosion surveys I always clamp the prop shaft
and often find errant current.
Inverters are often connected to the bonding system. The inverter
is especially suspect because it has a connections to both the
AC and the DC system. Be sure to clamp all inverter leads and
monitor the silver half-cell test during inverter operation.
Deck fittings
Corrosion above the water line (deck fittings) is also a problem.
Sea spray landing on metal and drying leaves a small amount of
concentrated salt crystals that hold moisture. This salt deposit
allows galvanic action to take place in small cracks and crevices
– and they cannot be protected by zinc.
A classic example is a galvanized chain attached to a steel anchor
with a stainless steel shackle. The galvanizing soon bubbles away,
leaving the last few links of chain to rust. And a chain is only
as strong as the weakest link.
Another common destructive path of electrical current is through
the anchor chain. Electrical voltage seeking ground will travel
down the chain and back into a through-hull fitting. This path
may occur when a positive lead comes into contact with deck metal.
An “energized” pulpit is a common culprit (with positive
leads feeding the running lights run inside the tubing). The pulpit
itself begins to seek battery ground, and the anchor chain can
provide the path through the water.
All exposed deck wires are suspect. Small amounts of chafe or
damage to the cover sees salt water entering the wire and forming
an electrical connection to surrounding metal.
There is quick test to see if a wire is leaking electrical power.
Simply energize the wire and clamp the duplex lead (duplex wire
is where the positive and negative leads are contained in one
plastic sheath). A clamped duplex wire should show zero amps.
You can even grab whole bundles of wires and clamp them. The bundle
should read zero. When you find a reading you have found a leak.
Induced current
Induced current is where an electrical charge is picked up, merely
by being in the vicinity of leaking electricity. A live electrical
cord laid across a metal deck, or tied along a lifeline, can cause
induced current. The magnetic field from the power cord “jumps”
or is induced into surrounding metal. Luckily, the silver half-cell
test on AC is an easy way trace this leak.
Another form of induced current is where the entire boat is in
the path of a larger electrical leak. For example, the next boat
along the pier may be leaking electricity into the water, and
it’s seeking ground on the other side of your vessel.
If a vessel disrupts such an electrical path, its bonding system
may become the path of least resistance, causing the stray current
to enter one end of the boat, follow the path of least resistance
(the bonding system’s copper wire) and exit a forward through-hull.
This form of electrical corrosion is easy to find with the silver
half-cell test (or clamp amp), but you have to be watching the
meter when the current passes. So if another boat’s battery
charger causes the leak and you monitor the silver half-cell when
the charger is off, you may miss seeing the corrosive warning.
Rigging
Stray current in a rig is common – and easy to find. A
metal mast will inevitably have a path to battery ground through
the VHF coaxial cable. The coax screws to the back of the VHF
(with a SSB there is similar path to battery ground). Clamp the
coaxial cable of the VHF, turn on all mast-mounted devices such
as spreader lights, radar, and navigation lights, and check the
clamp amp for current.
Also clamp each piece of standing rigging and examine it for
visual corrosion. Clamp the standing rigging while the mast is
fully energized with the lights on. There should be zero amperage
on both AC and DC, but you’ll often find current passing
through the stainless rigging.
At the base of the mast you should have some type of junction
box. Clamp the wire bundle. You should show zero at all times.
Any reading shows an unbalanced load and thus a leak. While checking
the wires at the base of the mast take note of the condition of
the mast base. This is a common area of corrosion and should be
inspected regularly.
A final tip: Electricity can travel through just about any metal.
This means it is important to clamp engine control cables, copper
hydraulic steering lines and handrails. I routinely find errant
current in the most unlikely places. Only with proper testing
can this corrosion threat be minimized.
Permanent silver half cell installation
Many yachts have installed a silver half-cell permanently in
the hull that leads to a meter at the electrical panel. This is
good, but I have not found any system that also monitors for stray
AC and hertz. For that reason some boat owners install the silver
half cell into the hull, and use a standard multi meter as the
testing device. This is an inexpensive method of providing monitoring
protection to just about any hull.
Build a electrical leak tracker
To track leaking current in a marina build a simple, portable,
mobile corrosion skiff corrosion monitor. Place dissimilar metals
in the water about two meters apart and monitor the voltage. In
short we will have built a submerged electrical field monitored
from inside a moveable skiff. In other words, a directional antenna.
When the space between the sensors encounters another electrical
field the meter voltage changes. Rotate skiff until the highest
voltage is found and follow the line to the source of the leak.
To the vessel owner this means an inexpensive method of tracking
errant electrical leaks. To the harbormaster this means a skiff
can drive through the marina and detect stray current.
Do you have a challenging corrosion problem? Why not call in
an expert? Scott Fratcher is available to help solve your marine
corrosion issues. Scott has a long history of quickly solving
corrosion problems on large and small vessels alike.
Click here to contact Scott
Fratcher, Marine Engineer
|
Marine
corrosion survey
.JPG)
.JPG)
%20(Custom).JPG)
.JPG)
.JPG)
.JPG)
.JPG)
.JPG)
.JPG)
.JPG)
.JPG)
.JPG)
%20(Custom).JPG)
.JPG)
.JPG)
%20(Custom).JPG)
%20(Custom).JPG)
.JPG)
.JPG)
.JPG)
.JPG)
%20(Custom).JPG)
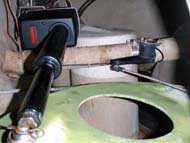

Basic Fast Flow Emergency Bilge Pump Kit
$599USD plus shipping
Fast flow pump installed.
Always ready - Alwasy pumping

Pump arrives in parts for easy install. No need
to remove the prop shaft
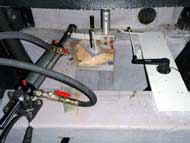
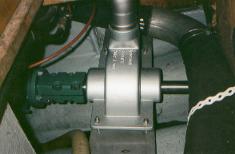
Prop shaft bilge pump installed and ready for
use
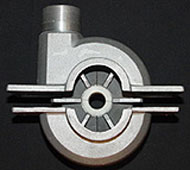
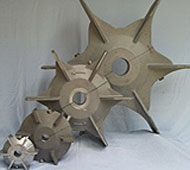
Impeller blades split in two for easy install
and come in various sized to meet every boat's needs

Pump is ready for installation.

This is a safe boat with the Fast Flow propeller
driven bilge pump
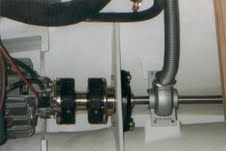
Example of a propeller driven Fast Flow bilge
pump in operation
Fast Flow emergency bilge pump in position ready
to save the day
Basic Fast Flow Emergency Bilge Pump Kit
$599USD plus shipping
Order your books by Scott Fratcher here
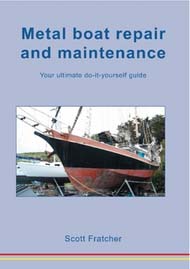
Metal boat repair and maintenance. A must read for any steel boat
owner.
Print:
$31.10
Download:
$12.00

How to repair a steel boat without sandblasting. Special report.
Download:
$4.00

In order to get a good job as a marine engineer we need a marine
engineer licence, commonly called a Certificate of Competency
Print:
$39.49
Download:
$29.50
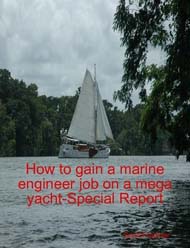
How to get a job on a mega yacht as a marine engineer? It can
be done without a licence.
Download:
$4.00

50 money making ideas run from a boat
Print:
$39.90
Download:
$39.90
Make money with boats? You bet! It's done every
day, but most people won't tell us how they did it. This book
is a tell all to give the layman the tools needed to start their
own onboard cruising business.
How to make money with boats has become an instant
classic selling around the world making dreams come true. If your
planning a cruise, or your know somone who is this is the perfect
book.
Print:
$39.90
Download:
$39.90

Print:
$21.37
Download:
$9.00
How to buy boats cheap? Dozens of tricks used
by adventurers around the world every day. This book is a must
read for anybody ready to purchase a boat.

Print:
$29.96
Download:
$9.00
The race was a heartbreaker, but eventually Earthrace took the
round the world speedboat record. This book is the log and blog
of the 2007 race where Earthrace set dozens of fastest ocean record
crossings.

Download:
$12.00
Earthrace in color. The same book as above, but in vivid color
to bring all the race moments right to the reader.

Print:
$14.97
Download:
$9.00
Anchor King is a narrative book of short stories of the Sausalito
California waterfront in the late 1980's. Anchor King contains
the award winning short story "Sex Toys?"

Print:
$115.47
Download:
$5.00
Tjalk Operator's Manual is an example of how
to build a yacht manual. Over 300 pages showing how to drive a
twin engine, single rudder vessel and much more.
|